
Hello all,
I just purchased (July 20th) my 1st MDX. Nighthawk Black, Touring w/o Navi or RES.
There are some great postings on adding a DVD system and I may have missed the answer to my question so I appologize in advance if I am asking a redundant question.
Over the weekend I purchased a Vizualogic headrest system from autobarn.com, should arrive shortly.
.
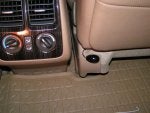
The basic installation seems easy enough but I am a little concerned with connecting it to the cars power. I want to avoid tapping into any harness wires and would prefer to tap into the fuse box; I think this approach will isolate the system from the rest of the cars electronics. This approach was also recommended to me by the Acura service manager.
Does anybody know how to do this properly?
I just purchased (July 20th) my 1st MDX. Nighthawk Black, Touring w/o Navi or RES.
There are some great postings on adding a DVD system and I may have missed the answer to my question so I appologize in advance if I am asking a redundant question.
Over the weekend I purchased a Vizualogic headrest system from autobarn.com, should arrive shortly.
.
The basic installation seems easy enough but I am a little concerned with connecting it to the cars power. I want to avoid tapping into any harness wires and would prefer to tap into the fuse box; I think this approach will isolate the system from the rest of the cars electronics. This approach was also recommended to me by the Acura service manager.
Does anybody know how to do this properly?